Adding Holiday Hours in Namely Time
How to set up and assign holiday hours in Namely Time.
OVERVIEW
This article will walk you through the steps of adding Holiday hours to Namely Time.
We recommend that you add holiday hours at least twenty-four hours before the actual holiday. If set correctly, the holiday hours will post to the employee’s time card in Namely Time at midnight the next day after the holiday has passed.
TIP:
For example, if holiday hours are added for 1/1/2021 on a Friday, those hours will populate on the employee's time card on 1/2/2021 on Saturday.
ADDING A HOLIDAY
-
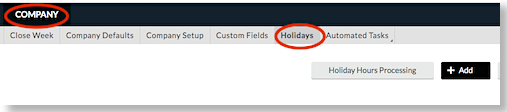
Click the Company tab and select Holidays.
-
Click Add.
-
Enter a Description for the holiday.
-
If the hours worked on this date will count as holiday hours, check Calculate qualifying hours worked on this date as holiday hours. This ensures that the holiday receives any special premiums as set up on the employee level.
-
If the holiday is a one-time occurrence, select Single date and enter the date. Otherwise, select when and how the holiday recurs.
-
If the system needs to automatically add holiday time to the employee for this day, place a check next to Include in holiday processing.
-
Shift start time: This is when the segment will start.
-
Job Code to add hours: This is where you will specify the segment's job code. This will typically be your desired holiday job code.
-
Work Filter: If employees who worked a certain number of hours are the only ones eligible for receiving time for a holiday, you can use the Work Filter to establish the parameters. For example, if an employee misses work the day before or after the holiday, they could be made ineligible for receiving holiday time by specifying how many hours and days before and/or after the holiday they would need to work in order to qualify.
-
-
Click Save to add this holiday.
Setting Probationary Period for Holiday Hours
If employees should only get holiday hours after being employed for a certain amount of time (ex. 90 days,) follow the steps below.
-
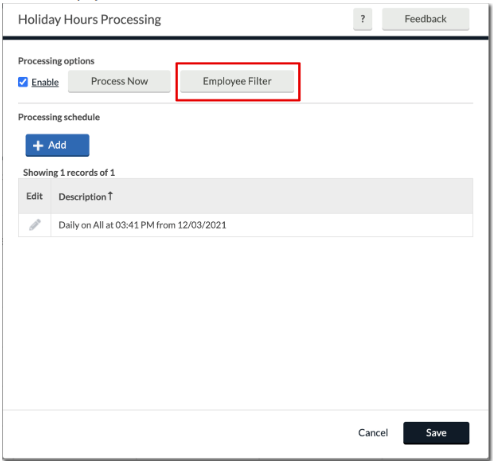
Go to Company > Holidays > Holiday Hours Processing.
-
Select Employee Filter.
-
Click Days Employed.
-
Enter the number of desired days in the Start box.
-
Click Filter.

ASSIGNING A HOLIDAY
You will need to assign the holiday by Employee Profile or Employee Role
Note: Assigning the holiday will be done in the same location whether it’s on the profile or role.

-
Click the Employee tab.
-
Select Employee Profiles or Employee Roles.
-
Choose the employee(s) or role the holiday will be assigned.
-
Click the Leave tab.
-
Click the (+) icon next to Holidays.
-
Click Assign to designate the holiday for the employee or the role.
UNASSIGNING A HOLIDAY
Similarly, you are able to unassign a holiday by Employee Profile or Employee Role.
-
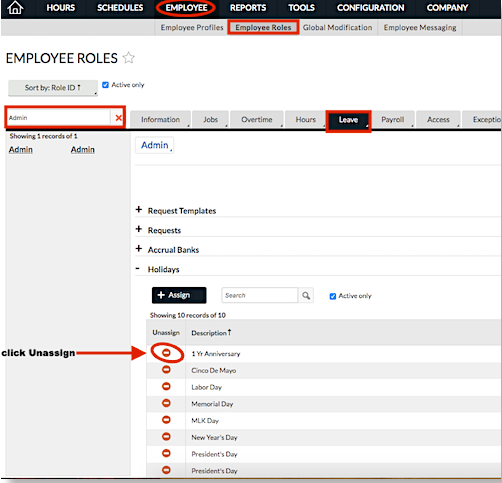
Click the Employee tab.
-
Select Employee Profiles or Employee Roles.
-
Choose the employee(s) or role the holiday will be unassigned.
-
Click the Leave tab.
-
Click the (+) icon next to Holidays.
-
Click the red button in the Unassign column for the holiday you wish to unassign.
-
Click Save.
TIP:
Remember to maintain and monitor that all Holidays are updated each year. Federal Observed holidays will often shift and should be addressed/updated accordingly each year.
Failure to maintain these Holidays could result in employees not having Holiday hours automatically generated on their Timecards and excluded in Namely Payroll during payroll processing.